The Mystery of the Gurgling Drain: Why Your Pipes are “Talking” Back
You just finished a load of laundry or watched the last of the bathwater swirl down the drain. Then, it starts: a rhythmic, hollow glug-glug-glug sound echoing from the sink or, more unsettlingly, from the toilet in the next room. It sounds like the house is trying to catch its breath.
While a gurgling drain might seem like a minor quirk of an older home, it is actually a specific SOS signal from your plumbing system. Much like the “water hammer” banging sound, a gurgle is a physical reaction to a pressure imbalance. In the plumbing world, we often say that for water to flow out, air must be able to get in. When that balance is disrupted, your drains start talking.
The “Straw” Analogy: Understanding Plumbing Physics
To understand why your drains are gurgling, you have to think about a simple drinking straw. If you dip a straw into a glass of water, place your finger over the top, and lift it out, the water stays inside the straw. Why? Because you’ve created a vacuum. Gravity wants to pull the water out, but air cannot get in the top to replace the space the water would leave behind.
Your home’s plumbing works on the exact same principle. Behind your walls is a complex network of “vent stacks”—pipes that carry no water at all. Instead, they lead up through your roof to the open air. These vents allow air to enter the system so that as water rushes down your drains, atmospheric pressure stays equal. When a drain gurgles, it means your pipes are struggling against a vacuum. They are literally sucking air through the water traps in your sinks or toilets because they can’t get it from the vent.
Common Culprits Behind the Gurgle
If you hear that tell-tale gasping sound, the problem usually falls into one of three categories:
-
A Partially Clogged Drain: This is the most common residential issue. A full clog stops water entirely, but a partial clog—often a buildup of hair, grease, or soap scum—restricts the flow. As water forces its way past the obstruction, it creates air bubbles that gurgle back up through the standing water.
-
A Blocked Vent Stack: Since the vent pipes exit through the roof, they are vulnerable to the elements. Bird nests, fallen leaves, or even a tennis ball can block the opening. In colder climates, frost can even bridge across the vent opening. When the “breather” pipe is blocked, the vacuum effect kicks in, pulling air through your P-traps.
-
The “P-Trap” Siphon: Every sink has a U-shaped pipe underneath called a P-trap. Its job is to hold a small amount of water to act as a seal, preventing sewer gases from entering your home. If your venting is poor, the suction from a draining fixture elsewhere (like a toilet flush) can literally suck the water out of a nearby sink’s P-trap. The gurgling you hear is the air breaking through that water seal.
Why You Shouldn’t Ignore the “Glug”
It’s easy to dismiss a gurgle as a “old house” charm, but ignoring it can lead to two significant problems:
-
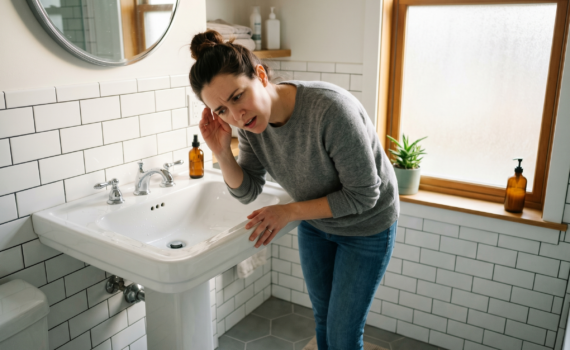
Sewer Gas Exposure: The most immediate risk of a gurgling drain is the loss of the water seal in your P-trap. Once that water is siphoned away, there is nothing stopping methane, carbon monoxide, and foul odors from the sewer line from drifting into your living space. If you hear a gurgle and then notice a “rotten egg” smell, your trap has likely been siphoned dry.
-
Imminent Backups: A gurgle is often the “warning shot” before a total backup. It indicates that the system is already under strain. What is a gurgle today could be a flooded bathroom tomorrow if a partial clog finally decides to grab onto one last piece of debris.
Signs for Homeowners to Watch For
Identifying the source of the sound can help you determine the severity. Pay attention to the “location-to-action” ratio:
-
Single Fixture Gurgle: If only the kitchen sink gurgles when it drains, the issue is likely a local clog in that specific branch line.
-
Cross-Fixture Gurgle: If you flush the toilet and the shower drain starts gurgling, you likely have a venting issue or a blockage in the main waste stack. This is a sign that the vacuum is affecting the whole bathroom suite.
-
The “Phantom” Gurgle: If you hear gurgling when no water is running at all, it could indicate a problem with the city’s sewer main or a significant venting issue that is reacting to pressure changes in the neighborhood lines.
What You Can Check at Home
Before calling in the pros, there are a few “investigative” steps a homeowner can take:
-
The Flashlight Test: Check the P-traps under your sinks. Are they leaking? If you hear a gurgle, use a flashlight to look down the drain. Do you see hair or debris caught just below the stopper? Sometimes a simple “zip-it” tool can clear a local clog and stop the noise.
-
The Roof Inspection (Safety First!): If you are comfortable on a ladder and have a shallow-pitch roof, you can visually inspect the vent stacks. Look for bird nests or debris covering the pipe openings. Note: Never climb onto a steep or wet roof; this is a task best left to professionals with the right safety gear.
-
The Water Seal Check: After you hear a gurgling sound, run a little bit of water into every sink and tub in the house. This “re-primes” the P-traps. If the smell goes away, you know for sure that the gurgling was siphoning your traps dry.
How Plumbers Solve Venting and Gurgling Issues
When we arrive at a home with “talking pipes,” we use a systematic approach to find the silence:
-
Augering the Vent: We often go to the roof with a specialized drain auger. By “snaking” the vent stack from the top down, we can clear out obstructions that a standard homeowner snake can’t reach.
-
Camera Inspections: If the gurgle persists, we use waterproof fiber-optic cameras to look inside the walls. This allows us to see if a vent pipe has shifted, cracked, or was improperly installed (which is common in unpermitted DIY renovations).
-
Air Admittance Valves (AAVs): In some cases where traditional venting isn’t possible (like in a kitchen island), we can install an AAV. This is a one-way valve that allows air into the system when needed but seals shut to keep sewer gases out.
When to Call a Professional
If your DIY efforts—like cleaning the sink stopper or using a plunger—don’t stop the gurgling, it’s time to call a residential specialist. Specifically, seek help if the gurgling is accompanied by slow drainage in multiple rooms, if you smell sewer gas, or if you see water backing up into the shower when you run the washing machine.